
I have recently been part of a project, Building Nomi, where I was able to work on different types of integration tasks. With Building Nomi we were analyzing everyday metadata from the calendar and email to map the cooperation within organizations.
I thought I might share some of the work here. In this post, I will walk through how to set up your Office365 to be able to access email and calendar metadata through Microsoft Graph API.
Steps:
- Register Building Nomi Application (https://portal.azure.com)
- Assign permissions to Building Nomi Application
Register Building Nomi Application
Login to portal.azure.com as Global administrator
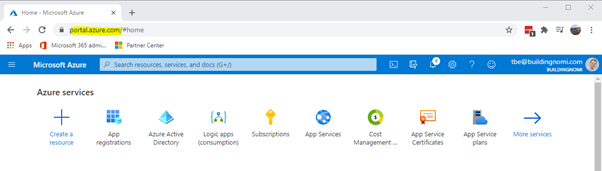
Search for and select App registrations

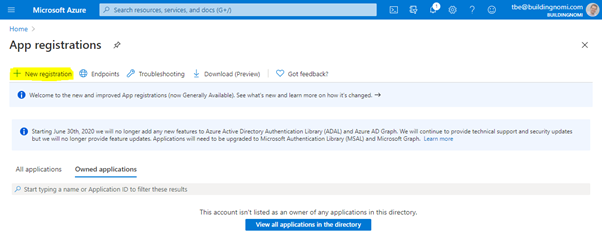
Select New registration
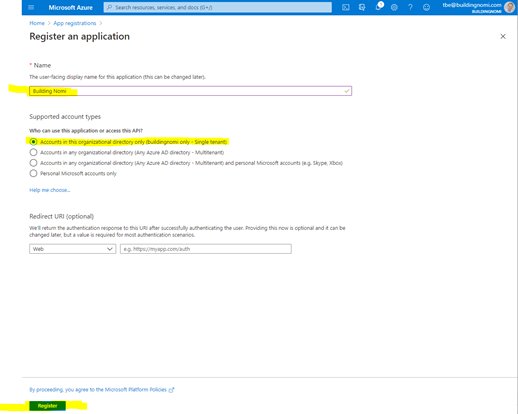
Type Building Nomi as name and click Register.
(*Only If you have a multi-tenant change accordingly in bullet list)
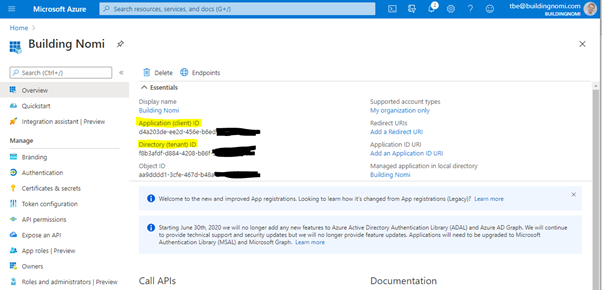
Note down your Application (client) ID and Directory (tenant) ID
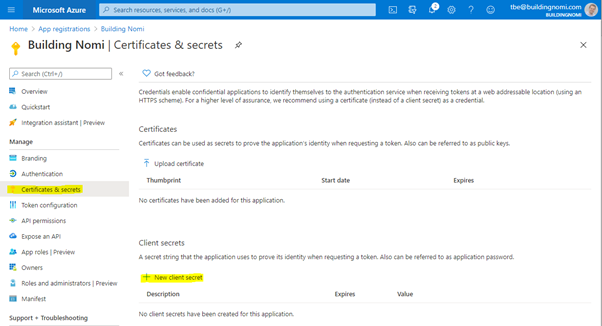
Now go to Certificates & Secrets in the left menu and click New client secret
Name the client secret Building Nomi and select your desired expiration.
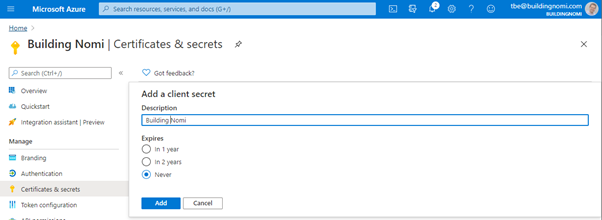
Note the Value of your client secret

Assign permissions to Building Nomi Application
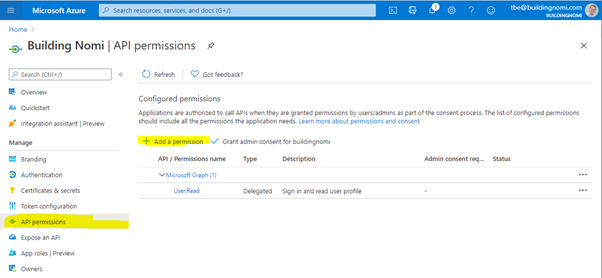
On your Building Nomi application, click Add a permissions
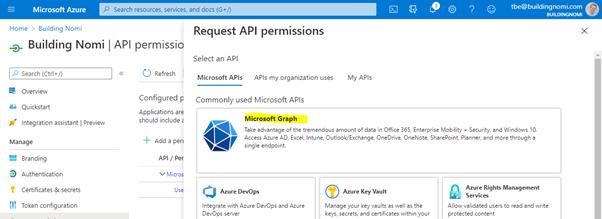
Click Microsoft Graph
Click Application permissions
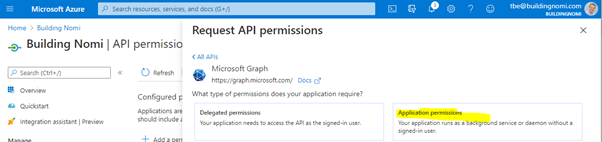
Now add permissions according to the table below
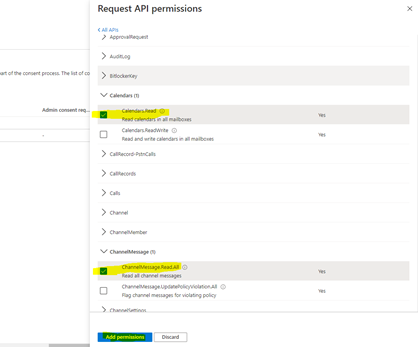
| Building Nomi Office365 permissions | Option |
| User.Read.All – Used by Building Nomi to read users Group.Read.All – Used by Building Nomi to read groups GroupMember.Read.All – Used by Building Nomi to read group memberships of users | Users and groups (Required) |
| Mail.ReadBasic.All – Used by Building Nomi to read Office365 e-mail metadata of users | E-mail (Optional) |
| Calendars.Read – Used by Building Nomi to get user’s primary Office365 Calendar | Calendar (Optional) |
| ChannelMessage.Read.All – Used by Building Nomi to read message metadata from channels in Teams | Teams (Optional) |
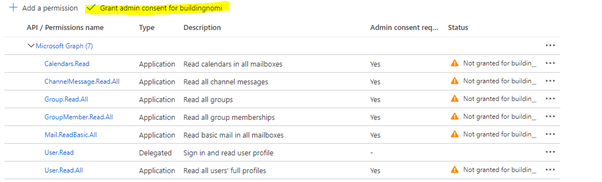
Click Grant admin consent for Building Nomi
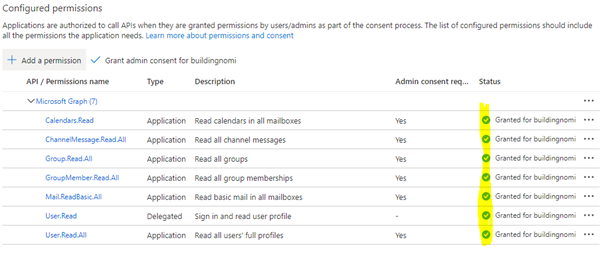
You are all set!